Stain's Green House

Staind

damaged goods
I'm way behind on my green house.:slap:

Building the Rocket Mass Heater has taken up my time but in a good way.

This green house is going to have a aquaponic set up on one end. The tank needs to be kept warm over the winter and the GH too.

So it needs a heat source and I have a cheep and efficient way of doing it NOW!! By using a RMH to heat the water and use the water as a thermal mass. To help keep the GH warm and the fishes.

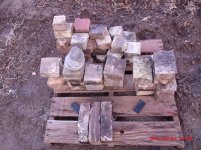
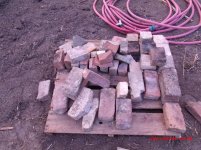
I will show every one, how easy they are to build step by step. With every thing used is junk I collected and you can too.

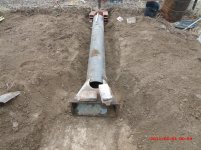
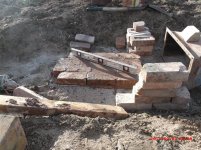
Last picture is the horizontal heat tube for the tank. It's a 10" x 3/16" x 8'4" piece a welder friend gave me. Any metal tubing (6" or bigger) can be used through/under the mass.

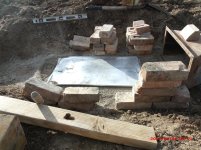
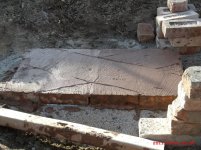
The tank is 7' wide and should fit above the vertical heat riser.

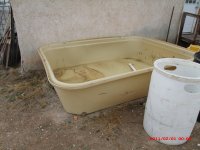
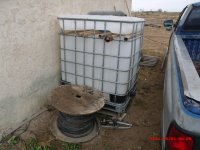
Then pictures of the tanks I will be using. The yellow tank was found in a field were it floated down the Pecos river when it flooded. The white tank(also from my friend).

Pics of the RMH core build tomorrow....

:puffpuffpass:
 

Attachments

  • gh rmh 0133.jpg
    gh rmh 0133.jpg
    356 KB · Views: 11
  • gh rmh 01000.jpg
    gh rmh 01000.jpg
    352.5 KB · Views: 12
  • gh rmh 0077.jpg
    gh rmh 0077.jpg
    230.9 KB · Views: 10
Yellow bellied mud cats and river carp. At first. :huh:

Then on to store bought fish.

Starting with MCs and carp because their low O2 fish and their free. I can just go to the river and catch them. Till I get the off grid system up and running.

Wind mill and solar pumps, all from junk.

suns peaking over the horizon and it's calm....off I go.
 
urbanite list.

Clay. source it first... Cleaner the better. Do a mason jar test.

Fill jar half way with test clay.

fill jar 3/4 full of water, shake until there is no lumps. Let it sit over night.

as it settles the sand/rocks are first.

2nd is silt

clay is the top layer. The minimum is 2/3 clay or higher.

see picture.

Brick (no concrete bricks for burn chamber)

100 at least. (for a 6" rmh)

Solid red fired brick pavers is the best urbanite and most common.

Fire brick

if you can find some great .If not red brick will work.
 

Attachments

  • soil_types_diagram3.jpg
    soil_types_diagram3.jpg
    16.9 KB · Views: 3
  • morning 00888.jpg
    morning 00888.jpg
    229 KB · Views: 5
  • morning 01000.jpg
    morning 01000.jpg
    213.4 KB · Views: 4
As you know this is going into a G H.

If you build one in a house with a wood floor. Number one thing is LOTS of insulation under the RMH. 2 layers of brick or better.

2000 f. + can be reached in the burn tunnel.

This is on crushed lime stone packed and leveled. Sand will work I have a huge pile of the crush lime stone and sand out back. There was a adobe brick co here in the past.

Lay down any sheet metal you can find. This will keep moister from creeping into the brick from under it.

like this
 

Attachments

  • bottom 00444.jpg
    bottom 00444.jpg
    204.8 KB · Views: 3
It don't take long for it to start roaring and warming things up either. Stopped by and checked it out a few nights ago upon return from road trip to Albuquerque.

Show the rest of the pics staind!

YJ
 
clay slip/mortar

take your clay days be for you start and mix it in buckets until it as thick as pudding. soupy

make a mixer or buy a dry wall mud mixer.

This slip is what the mortar can be made from.

OR you can spend big money on fire clay mortar if you want it to last for years.

This RMH is being built on a dirt poor budget. That any one can afford.

I mixed screened sand (window screen)into the slip until a nice creamy texture.

ALWAYS wet your brick or it will suck the water out of you mortar. This will cause it to crack and not stick well.


1st coarse laid. This will be the bottom of the burn chamber and support for the sides.
 

Attachments

  • bottom 00333.jpg
    bottom 00333.jpg
    364.7 KB · Views: 6
  • bottom 00555.jpg
    bottom 00555.jpg
    245 KB · Views: 6
  • bottom 00999.jpg
    bottom 00999.jpg
    228.5 KB · Views: 3
Did the 2nd course @ 6" wide.

This course has a wedge at the end of the burn tunnel.

This wedge helps the gasses flow up the riser smother. This is some thing I came up with and tested with and with out.

With out. The flow had a lot of turbulence at the end of the burn tunnel.

With. The gasses has a smooth path to fallow and less turbulence, better flow.

It will work with out it but better with it.

It is a little hard to cut, just take your time. It is well worth it.

In the picture it has a 1" lip on the back. Cut it down to 1/4" after the 45 cut. If it breaks, no big deal use it any way. It is being mudded in and will still work.

When laying the brick. Just dip the whole thing in the mud mortar and set them. After each course, wipe them down smooth. Then brush it with a soft brush.

thanks for watching.:puffpuffpass:
 

Attachments

  • gh rmh t 01414.jpg
    gh rmh t 01414.jpg
    358.8 KB · Views: 0
  • fish rmh 01111.jpg
    fish rmh 01111.jpg
    146.3 KB · Views: 1
Last edited:
air follows the path of least resistance. the 45 makes for a smoother transition in the turn!!

looking good~!!
 
Back
Top