


The St.
Pine Bag
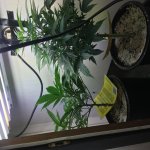
Here it is, I used to grow in a 150w HPS cabinet I made from an armoire that I bought from a retired cop that said he had kept his uniforms in it while he was on the force, irony. I grew quite a few great strains in that thing. Then I just got out of growing, was working too many hours and didn't have the time to tend to the girls. Well, here I am today, with a little more time on my hands.
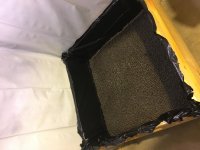
I took Soma's indoor bed idea, straight up stole it, and adjusted it to my needs. My bed is 3'x3'x16"deep, lined with plastic to keep it water tight. The base is on casters so I can roll it around and move it with ease. About 2" of clay pebbles are spread in the plastic lining, topped with plastic hardware cloth, topped with landscape fabric, the 3" PVC pipes in the corners go down into the clay pebbles about 1"(this is for air to get down below the bed and clay pebbles to the roots).
I intend to do a no till bed with this, I plan on picking up some Blumats to make it even easier on me.
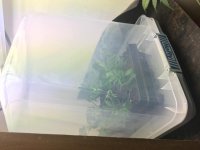
I made my soil with worm castings, a few different bags of potting soil (FF ocean forest, biobizz light mix, coast of Maine potting soil enriched with compost and seaweed. Whatever I had laying around) I amended this with extra perlite, lots of worm castings, BioTone+myco, bat guanos, and organicare pure grow. I mixed all this up in a 55 gallon tote, dumped in about 1.5 gallons of water mixed with molasses and covered it up. I'll let it sit for a few weeks to get all the beneficials going. Then toss it in the bed and top it with another bag of light mix to plant directly into.
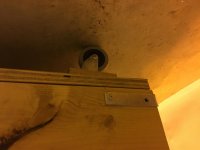
I will be growing under a magnum xxxl 8" reflector with a lumatek 400w superlumen digital ballast cooled with a fantech 6xl.
I have just two girls going right now of unknown lineage, I think I will grow these out until I can get some cuts off of them and plant rooted cuts right in the bed.
Thanks for stopping by!
I took Soma's indoor bed idea, straight up stole it, and adjusted it to my needs. My bed is 3'x3'x16"deep, lined with plastic to keep it water tight. The base is on casters so I can roll it around and move it with ease. About 2" of clay pebbles are spread in the plastic lining, topped with plastic hardware cloth, topped with landscape fabric, the 3" PVC pipes in the corners go down into the clay pebbles about 1"(this is for air to get down below the bed and clay pebbles to the roots).
I intend to do a no till bed with this, I plan on picking up some Blumats to make it even easier on me.
I made my soil with worm castings, a few different bags of potting soil (FF ocean forest, biobizz light mix, coast of Maine potting soil enriched with compost and seaweed. Whatever I had laying around) I amended this with extra perlite, lots of worm castings, BioTone+myco, bat guanos, and organicare pure grow. I mixed all this up in a 55 gallon tote, dumped in about 1.5 gallons of water mixed with molasses and covered it up. I'll let it sit for a few weeks to get all the beneficials going. Then toss it in the bed and top it with another bag of light mix to plant directly into.
I will be growing under a magnum xxxl 8" reflector with a lumatek 400w superlumen digital ballast cooled with a fantech 6xl.
I have just two girls going right now of unknown lineage, I think I will grow these out until I can get some cuts off of them and plant rooted cuts right in the bed.
Thanks for stopping by!